I had a couple of weeks off recently where I was staying at home for most of that time. I intended to relax and have fun, but there were also a few side projects I wanted to make sure I worked on. I thought: “I should keep myself reminded of how many days left I have before going back to work.”, the hope being that the frequent reminder keeps me motivated to get my stuff done.
My first approach was to write it out on a calendar hanging in my home office. I simply wrote the number of days remaining next to the corresponding day on my calendar. Unfortunately, my calendar wasn’t well-suited for this usage scenario. The writing wasn’t very visible and I would have to remember to look at the calendar everyday.

A Higher-Tech Solution
I then got to thinking about a daily email reminder. Receiving a message every day that reminded me of my remaining time would be ideal. I initially considered writing a an Azure function, but then I remembered that I’ve been looking for an excuse to try Microsoft Flow. It took a little trial and error, but overall the experience was quite pleasant.
Summary
If you’re in a hurry here’s a quick summary:
- Create a new flow of type “Scheduled”
- Enter the recurrence settings for when to run the flow
- Add an email step for sending emails and fill in the details
- Insert the number of days countdown using a dynamic content expression:
div(sub(ticks('2020-01-01T07:00:00Z'), ticks(utcNow())), 864000000000)
- Save your flow and test it
- Use Twilio if you want SMS notifications
If those bullet points aren’t enough, below are more detailed instructions:
Create a new Flow
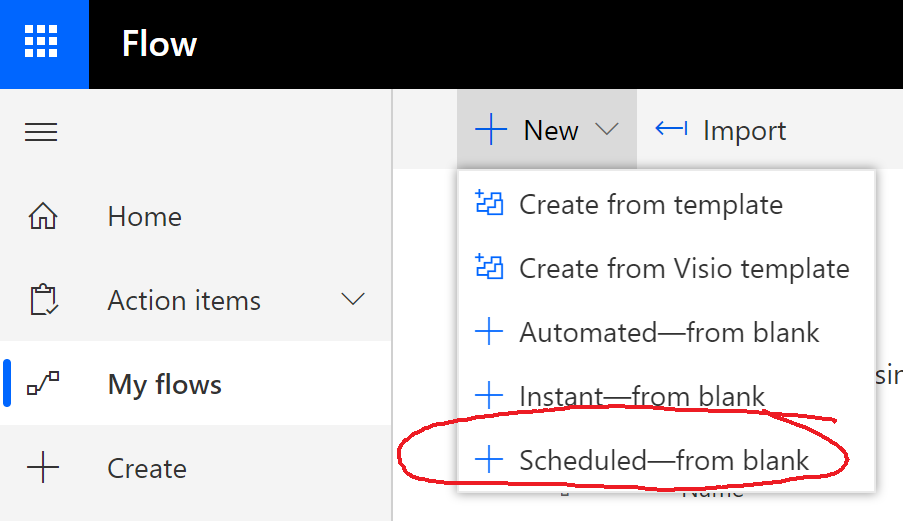
Once you’re logged into the Flow dashboard, get started by selecting “New Flow” at the top and selecting a “Scheduled” type.
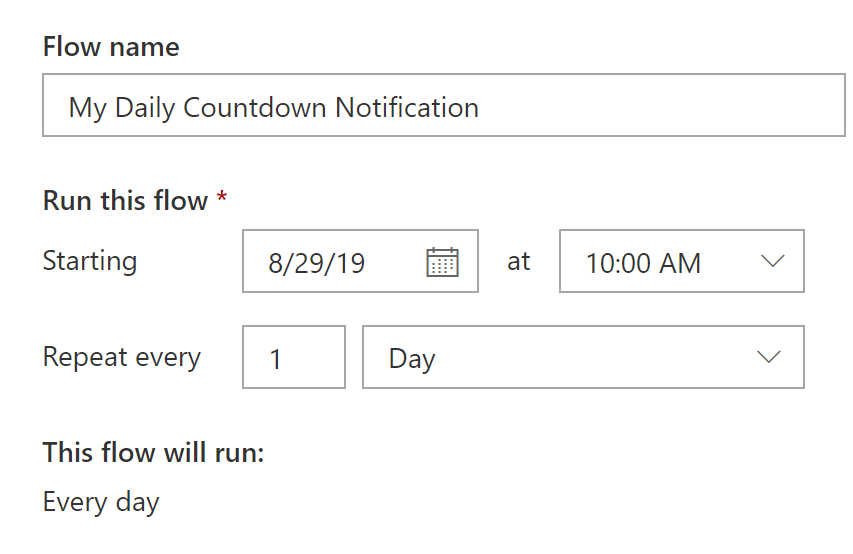
Give your flow a name and click “Create”. I recommend ignoring the rest of the form since you’ll be able to more finely edit the flow later.
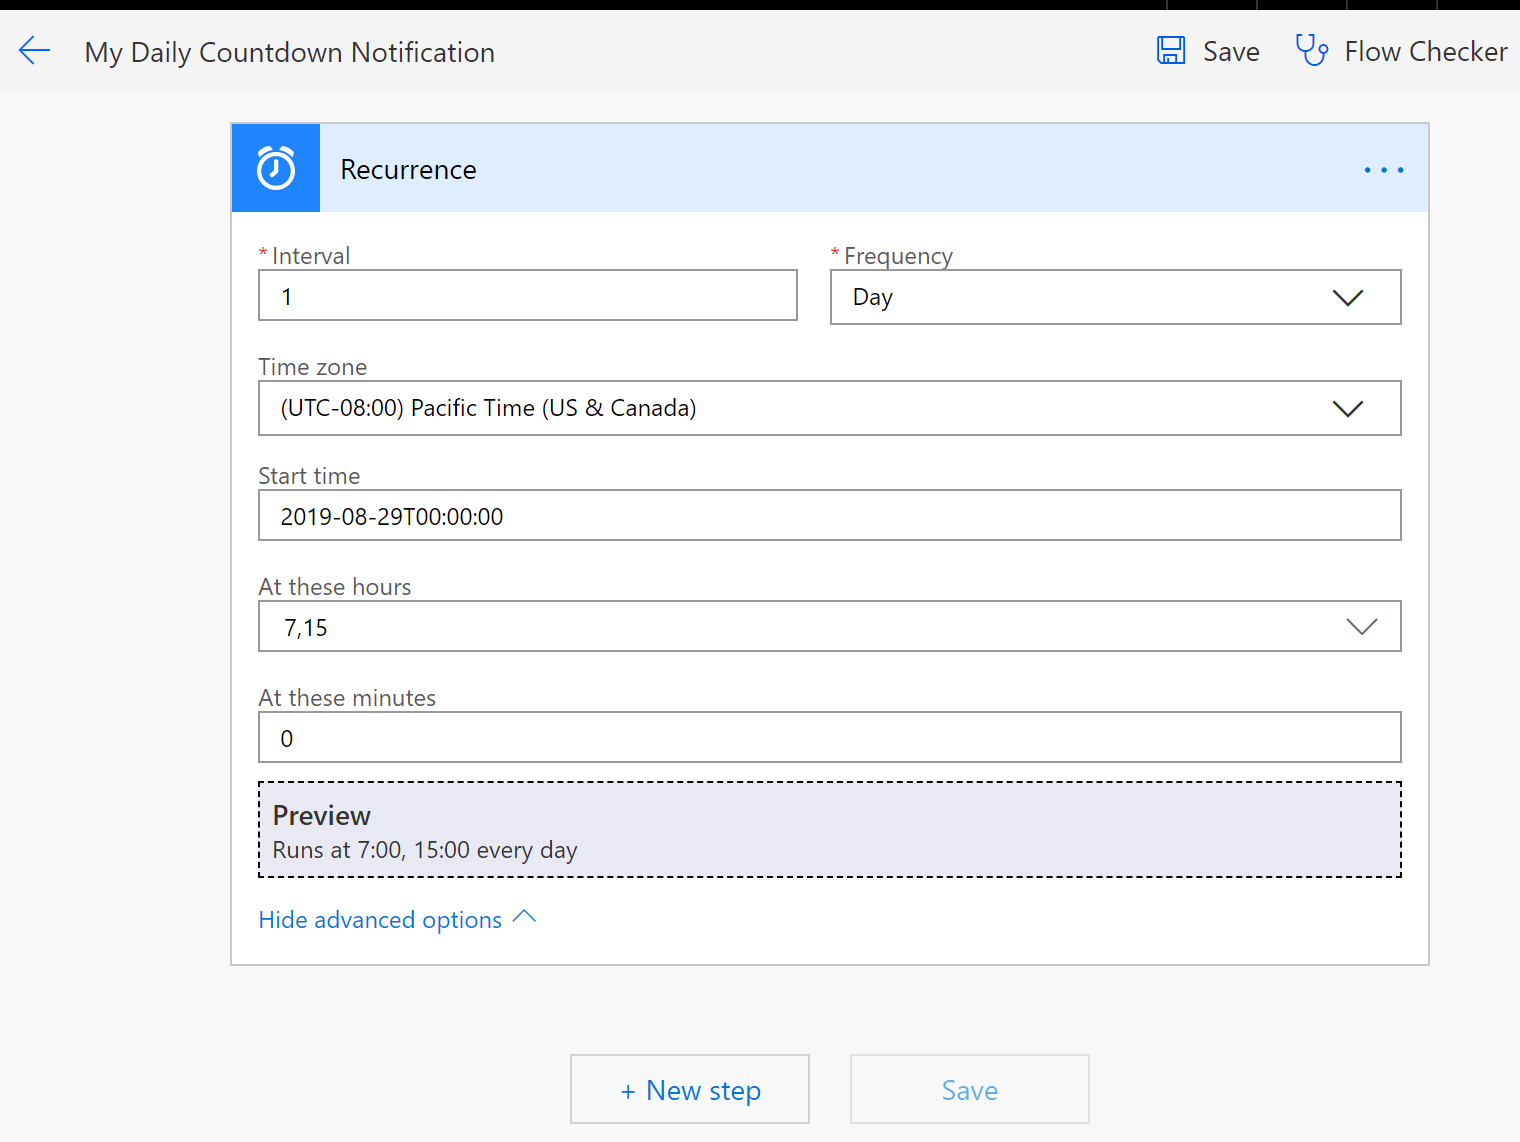
After clicking “Create”, you’ll see the main flow diagram. You can expand the recurrence box and fine-tune the schedule. For example, I decided to send my reminder out twice a day: once in the morning and once in the afternoon.
Add an Email Notification Step
Next, we’ll create an email notification step. Click the “New Step” button at the bottom of the flow and search for “email”.
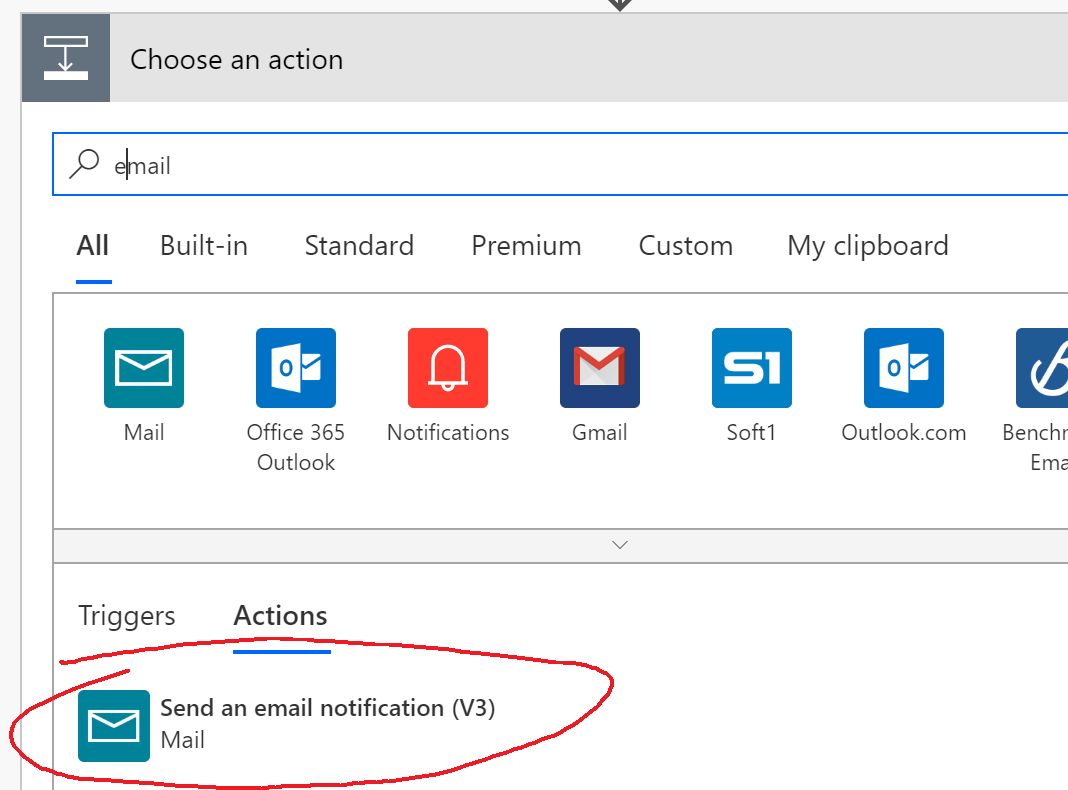
Select the email notification step and add a destination email address and a template of the subject and email text that you want to send.
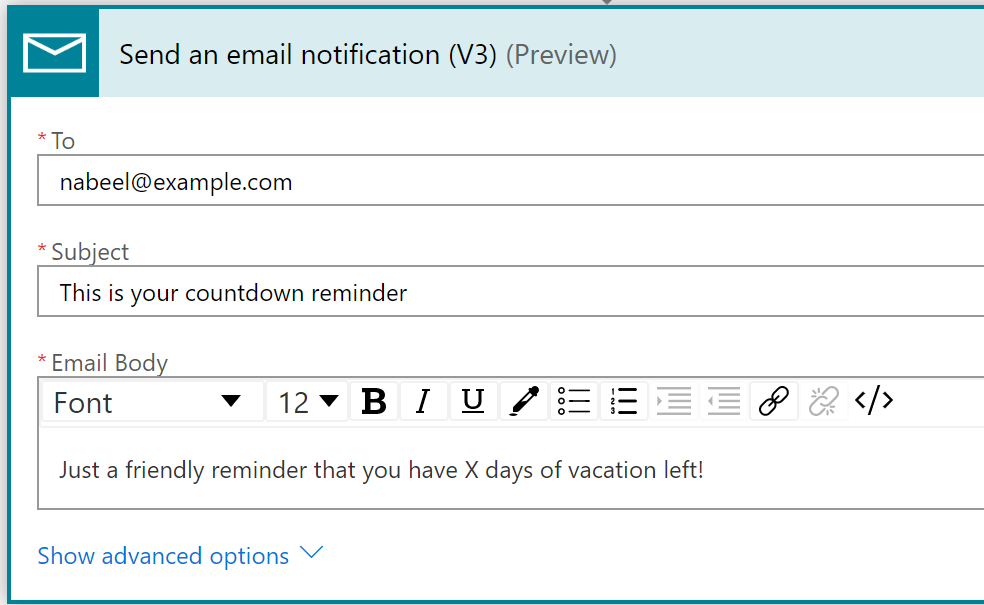
We now have an email notification going out at the times we specifify. However, you’ve probably noticed that the email doesn’t include the actual number of days remaining to our target date. That’s where expressions come in and we’ll get to that next.
Adding Dynamic Content
Next we will use the dynamic content feature to insert variable text in our email. To do this, place the text cursor in the location where you want to insert the content, click “Add dynamic content” and select the “Expression” tab. Note: There appears to be a bug in the tool where the “Add dynamic content” button doesn’t appear. If you can’t see the button, try expanding your browser window to full-screen.
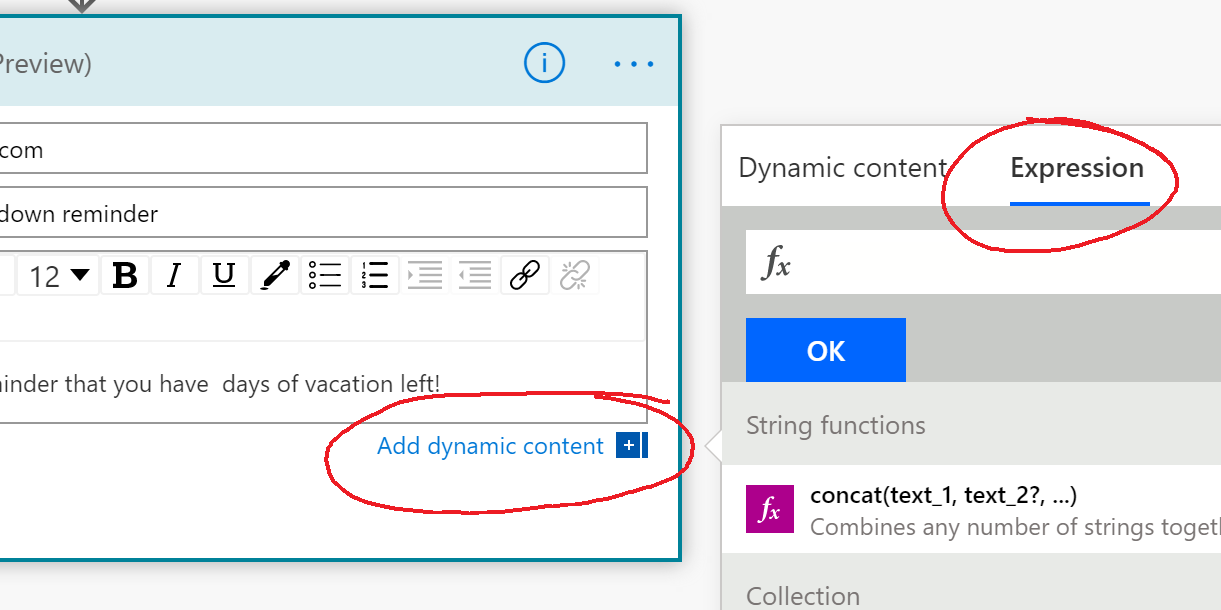
I used an expression to calculate the number of days to my target date. The following example would give you the number of days to January 1, 2020:
|
|
The calculation is as follows:
- Calculate the target date in UTC (in my case, Pacific time is 7 hours behind UTC)
- Subtract the ticks of the current time from the ticks of the target date
- A tick is 100 nanoseconds which makes a day equal to 100006060*24 ticks
- Divide the number of ticks by 864000000000 to get the number of days
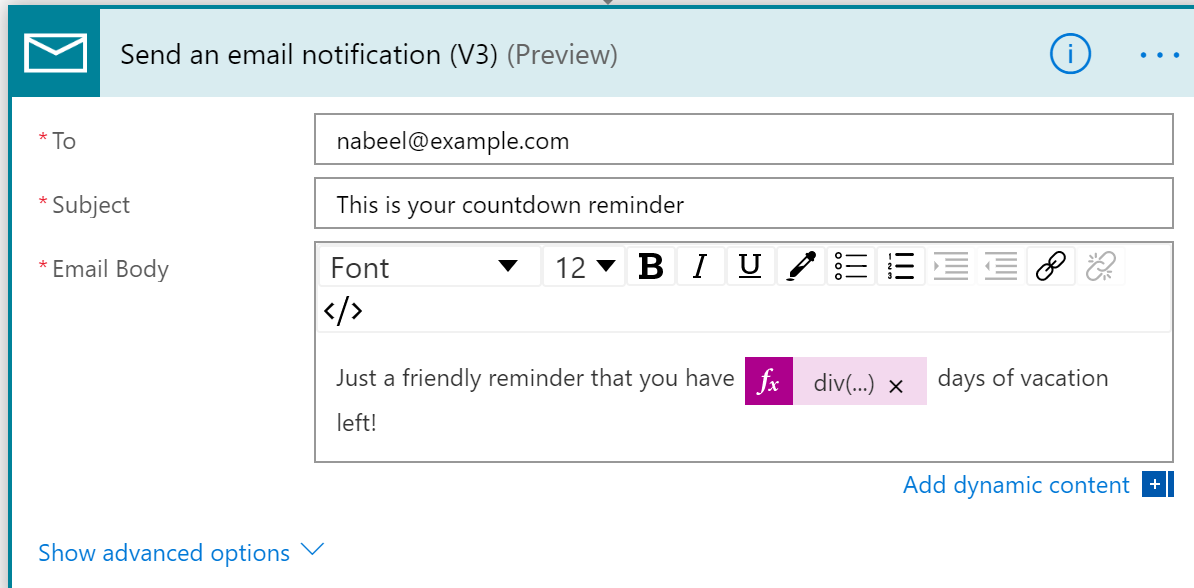
When you save your dynamic content, it should look something like this:
Using Twilio for SMS
I was also able to do the same thing with SMS instead of emails using the Twilio action. Text messages are handy if you don’t read your email consistently. However, the downside is that SMS messages cannot be sent for free. They are however quite cheap in many countries.
To use Twilio, simply go to their site and register an account. You will then need to enter your Twilio credentials in your Flow action. You can then set the contents of your text message as we did in the email scenario.
